Vim For Technical Writers Using Markdown

Vim configuration and plugins that I use for technical writing with Markdown.
I have found myself gradually using the vim editor for Python development and writing with Markdown, on both macOS and Linux Ubuntu environments. For me, vim is a lightweight editor and has fewer distractions compared to something like LibreOffice, Microsoft Word, PyCharm, VSCode etc.
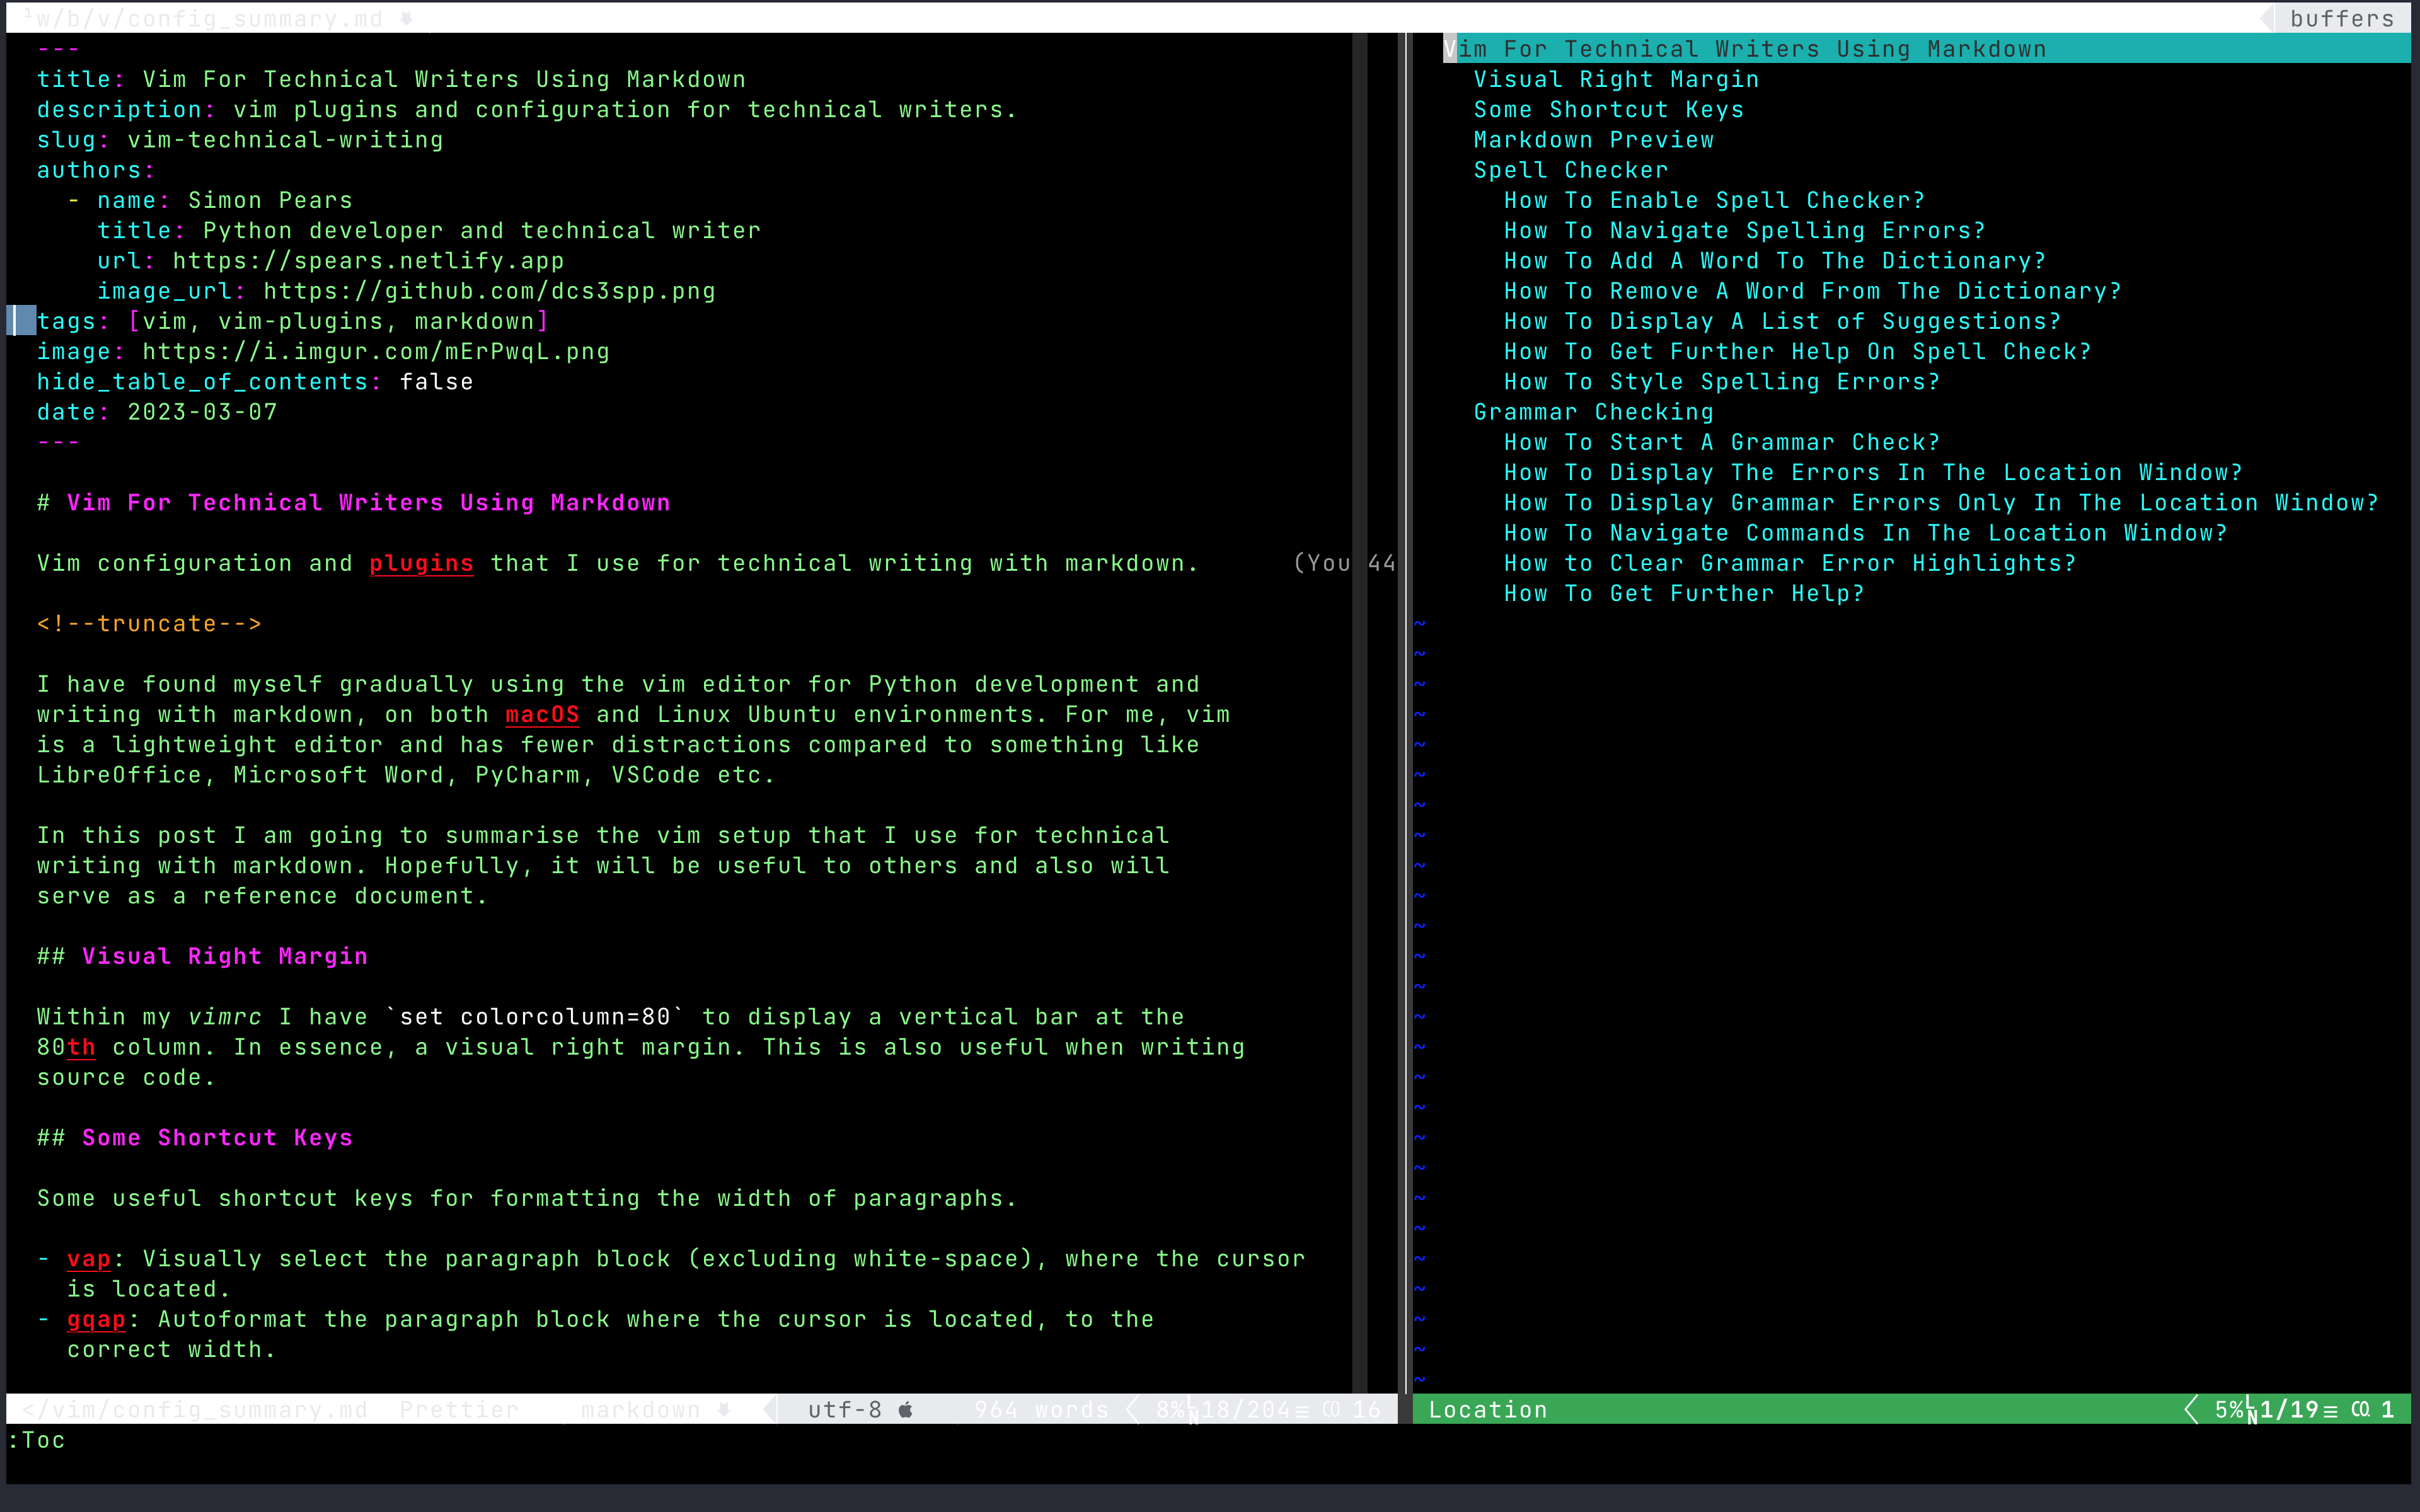
I use the vim-markdown plugin. This
gives me syntax highlighting and table of contents. The table of contents can be
displayed by issuing the :Toc command. I can also insert a table of contents
for the document that I am writing by issuing the :InsertToc command. Take a
look at the vim-markdown repository
for further information.
In this post I am going to summarise the vim setup that I use for technical writing with Markdown. Hopefully, it will be useful to others and also will serve as a reference document.
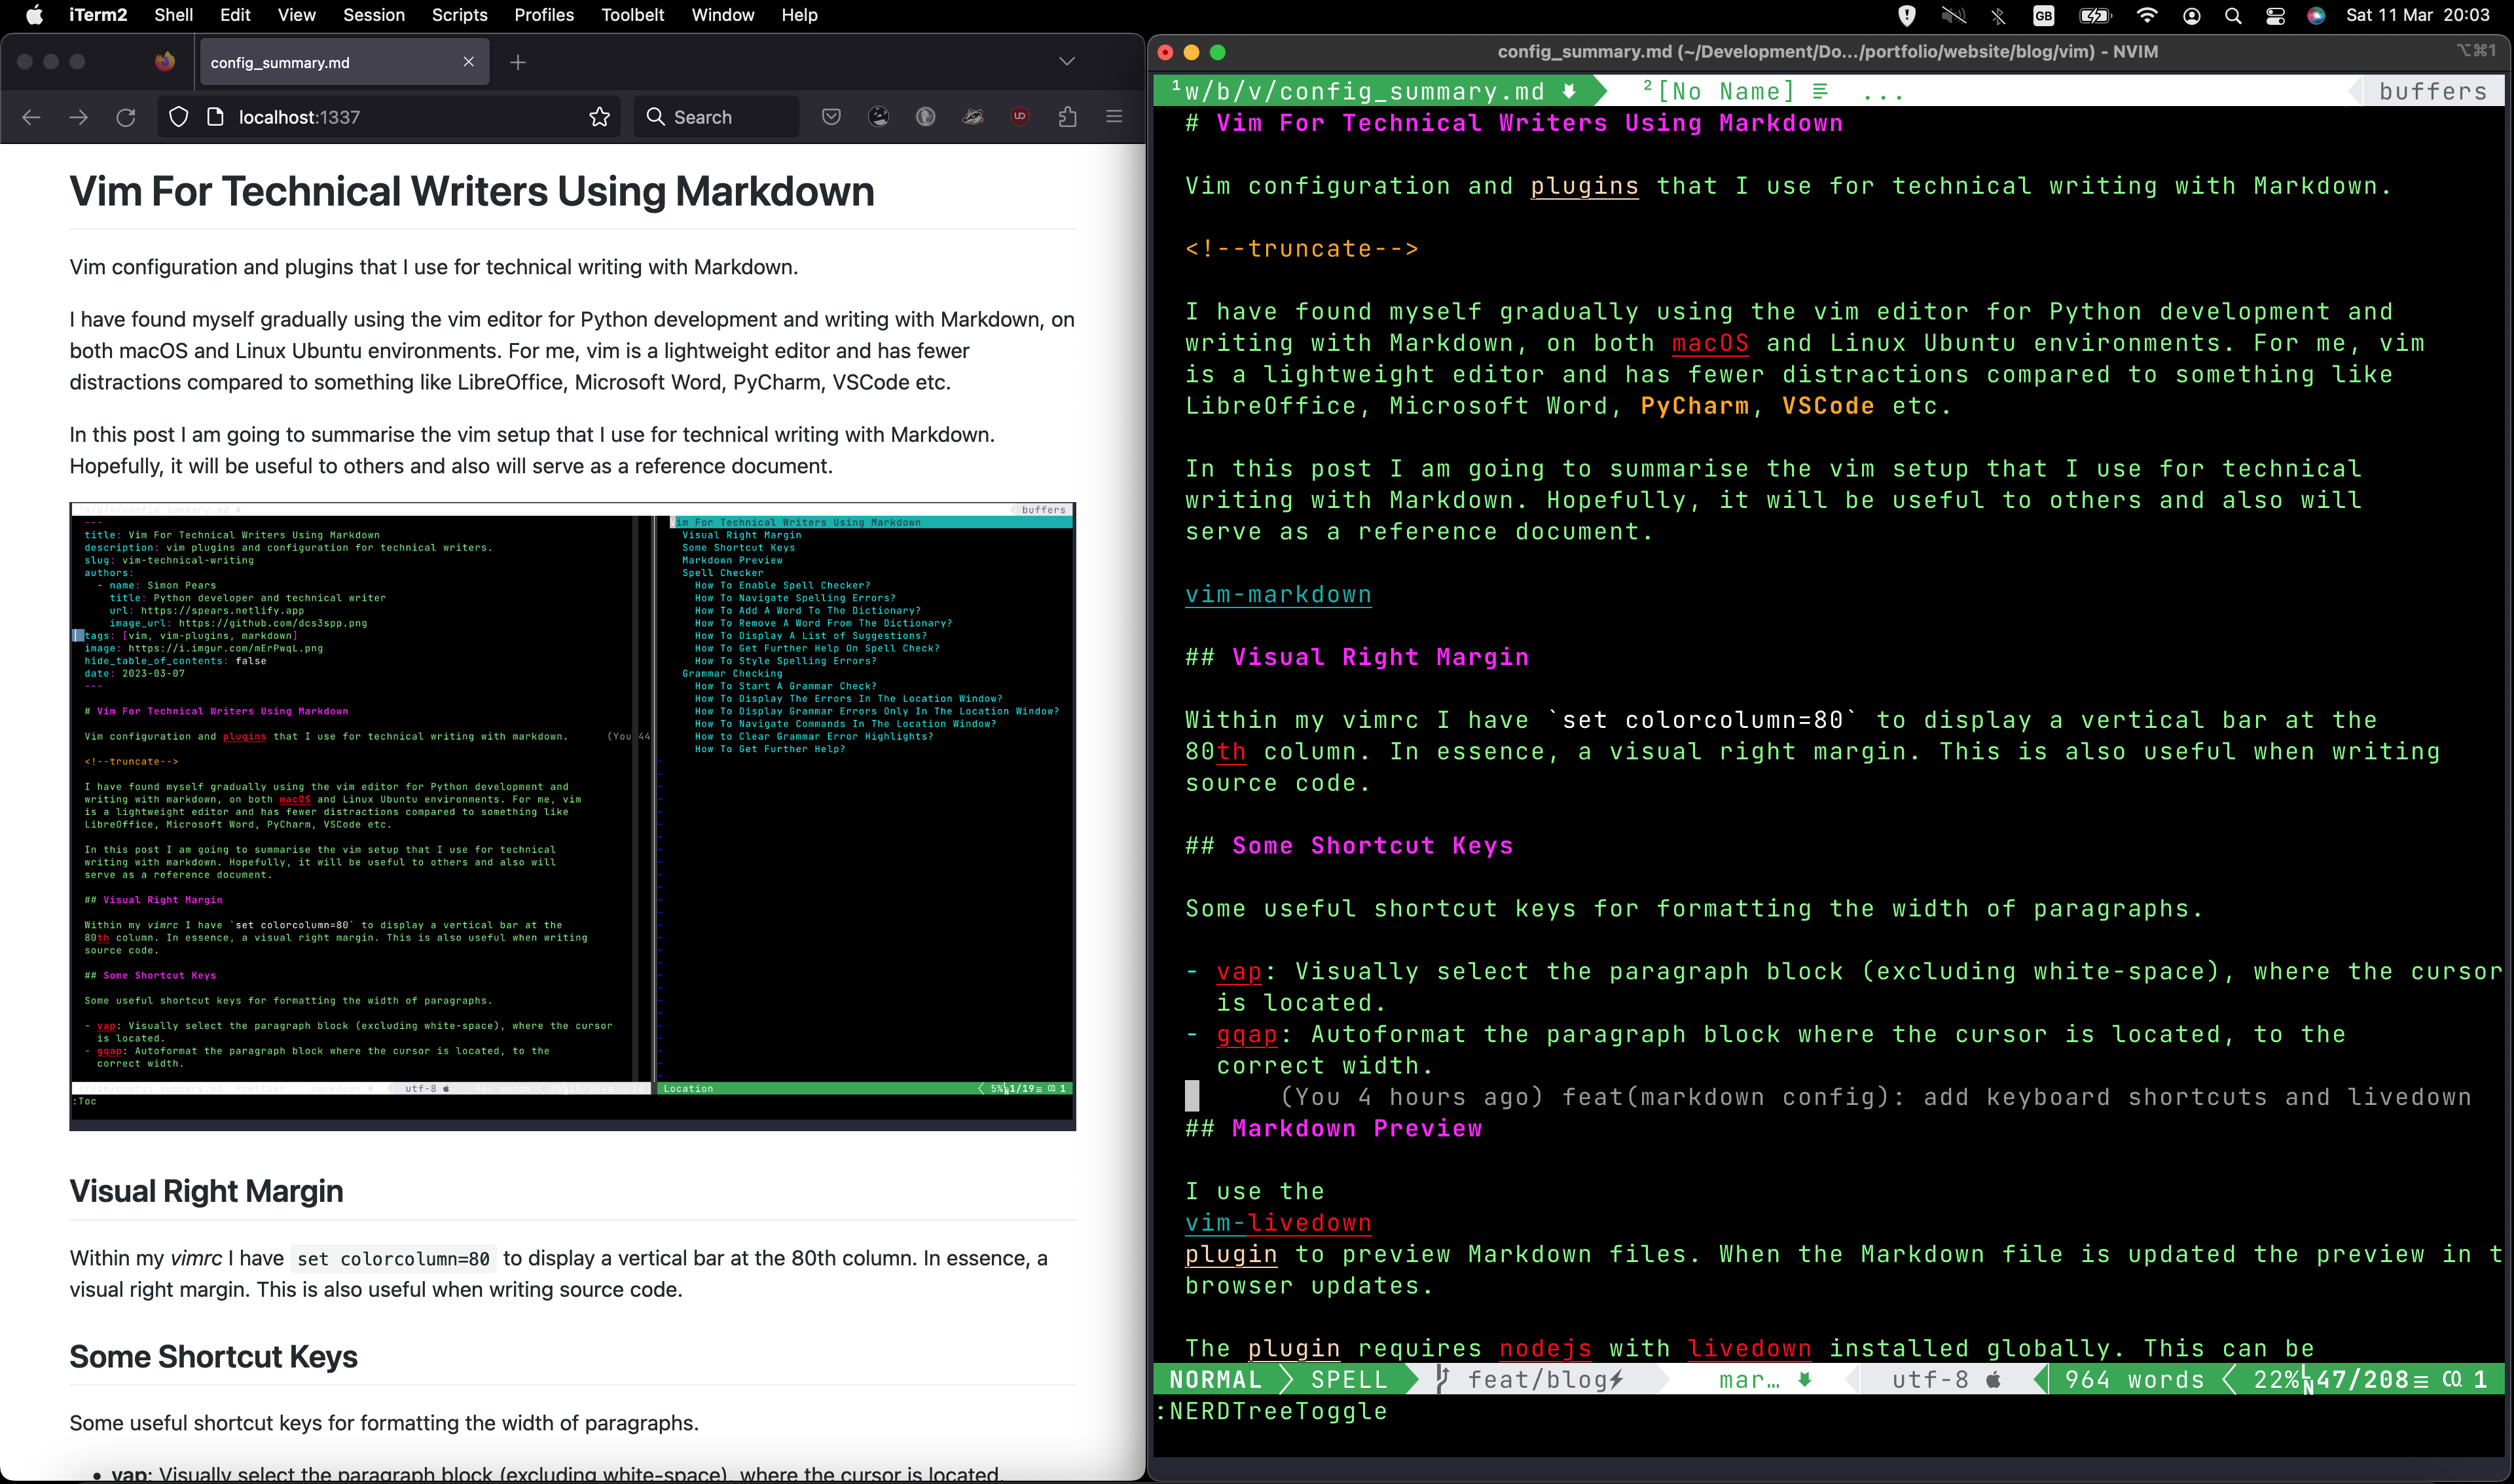
How To Display A Visual Right Margin?
Within my vimrc I have set colorcolumn=80 to display a vertical bar at the
80th column. In essence, a visual right margin. This is also useful when writing
source code.
How To Format A Paragraph For Width?
Some useful shortcut keys for formatting the width of paragraphs.
- vap: Visually select the paragraph block (excluding white-space), where the cursor is located.
- gqap: Autoformat the paragraph block where the cursor is located, to the correct width.
How To Preview Markdown?
I use the vim-livedown plugin to preview Markdown files. When the Markdown file is updated the preview in the browser updates.
The plugin requires nodejs with livedown installed globally. This can be setup as follows, depending upon if yarn or npm is installed:
- yarn:
yarn global add livedown - npm:
npm -g install livedown
I have configured a keyboard shortcut in my ~/.vimrc file to preview.
nmap gm :LivedownPreview<CR>
When I press gm, the Markdown file is rendered in the default browser.
Further configuration details can be found here
Spell Checker
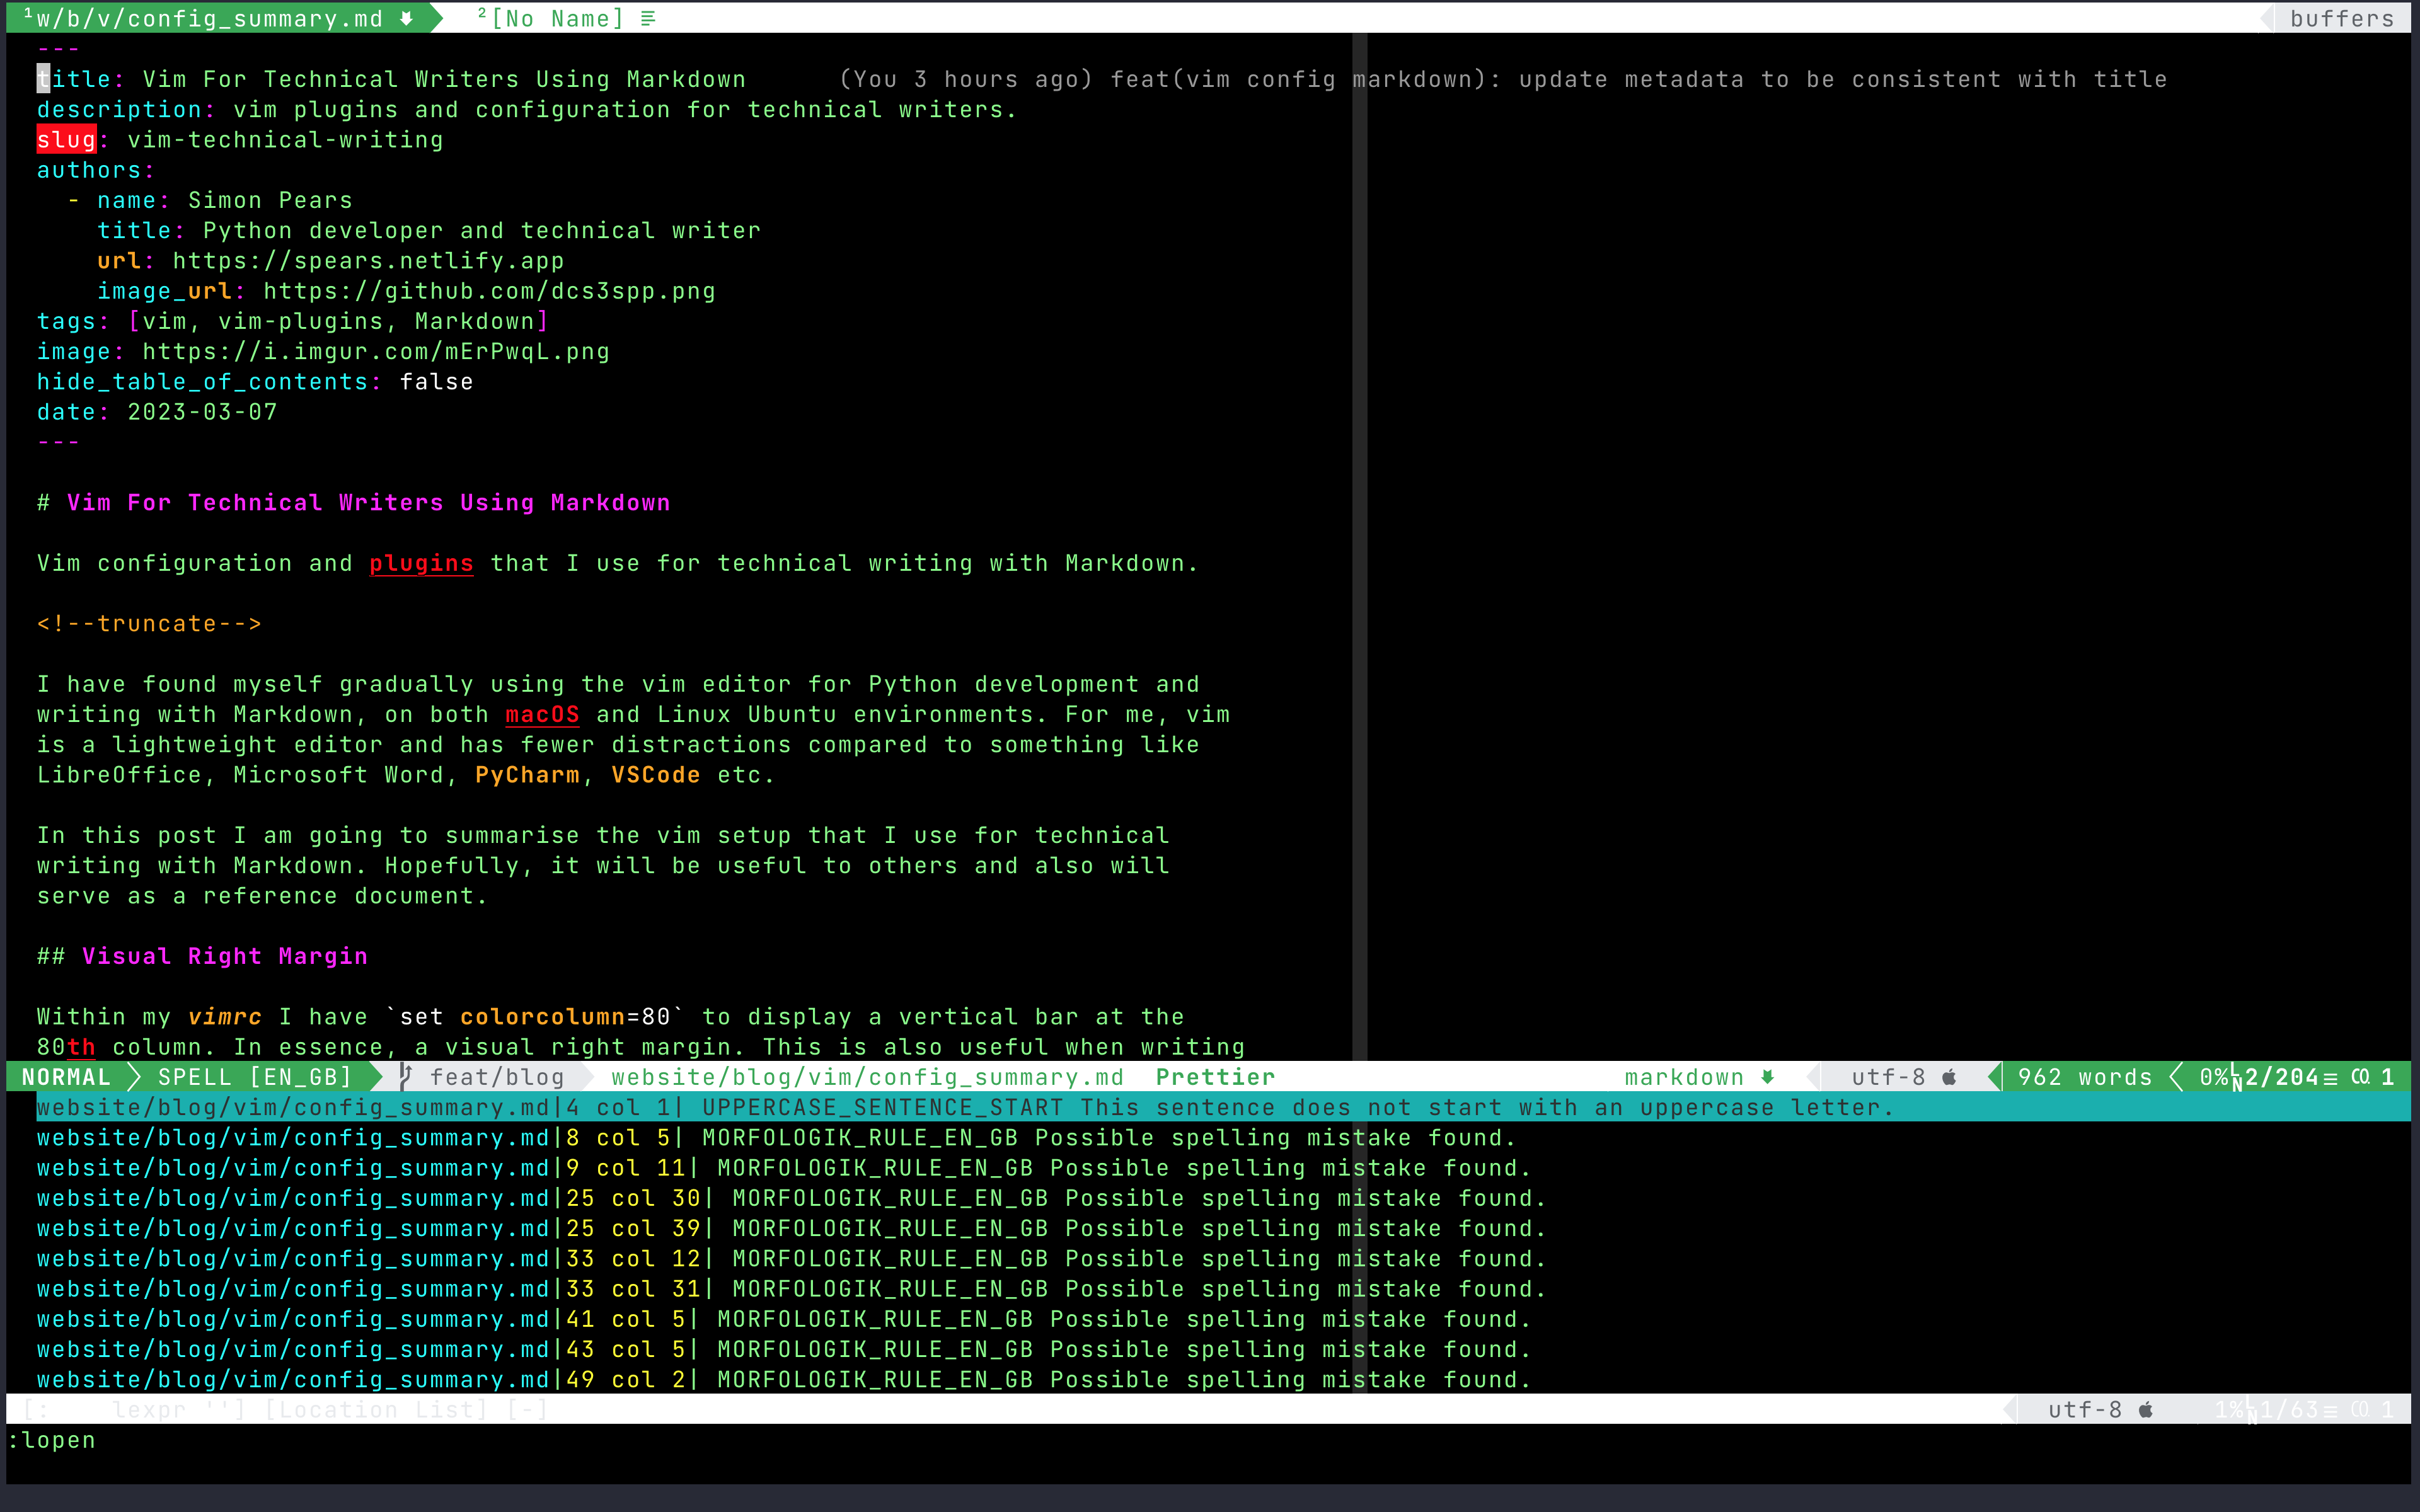
The spell checker highlights words that are not in the dictionary. This is done both globally and for the configured regional dictionary language. I use the built-in spell checker provided by vim.
How To Perform A Spell Check?
For all open buffers the spell checker can be enabled with :set spell.
To activate spelling for the active buffer, use :setlocal spell.
It is also possible to use the spelllang parameter to specify the dictionary
language. For example, :set spell spelllang=en_gb or :setlocal spell spelllang=en_gb.
How To Navigate Spelling Errors?
Use [s to move to the previous word and ]s to move to the next.
How To Add A Word To The Dictionary?
Move the cursor to the word and type zg
How To Remove A Word From The Dictionary?
Move the cursor to the word and type zw
How To Display A List of Suggestions?
Move the cursor to the word and type z=
How To Style Spelling Errors?
Highlight styles can be set for the following:
- SpellBad: Words not recognised by the spell checker
- SpellCap: Words that should start with a capital letter
- SpellLocal: Words recognised by spell checker as specific to the locale language
- SpellRare: Words recognised by spell checker as rarely used.
For example consider the following highlight command:
h1 SpellBad cterm=underline,bold ctermfg=red
This will style unrecognised words as red, bold and underlined.
For further information visit the highlight-args help topic:
:h highlight-args
I have setup such styles in ~/.vim/after/ftplugin/markdown.vim and enabled the
spell checker for the local buffer. These are configured after Markdown files
are loaded via the file type plugin, ftplugin.
How To Get Further Help?
Use vim help, :help spell
Grammar Checker
After some initial investigation, there looks to be two plugins provided for grammar checking:
Both use a Java library, LanguageTool to perform the grammar checking. Unfortunately at the time of writing LanguageTool 6.0 has introduced a breaking change that affects both plugins. The current solution is to install the older 5.9 version of LanguageTool.
I prefer the vim-LanguageTool plugin. I initially tried installing and configuring vim-grammarous plugin and experienced no detailed error messages when I encountered setup issues. I found that the documentation was also sparse. For this reason, I started using the vim-LanguageTool plugin.
I have configured vim-LanguageTool as follows:
Plug 'dpelle/vim-LanguageTool'

let g:languagetool_jar='/mnt/hdd/lib/languagetool/LanguageTool-5.9/languagetool-commandline.jar'
let g:languagetool_lang='en-GB'
N.B. I downloaded LanguageTool 5.9 and updated the languagetool_jar setting
to reference version 5.9.
How To Perform A Grammar Check?
:LanguageToolCheck will issue the Java languagetool command to check the
contents of the current buffer. The errors will be listed in a new vim scratch
window. The errors are also available in the location window.
Pressing the ENTER key on each highlighted error will navigate to the
corresponding line in the buffer
How To Use The Location Window?
How To Display The Errors In The Location Window?
The errors are also populated in the vim locations list window. This can be
displayed by issuing the command, :lopen. To close the location list window
issue the command, :lclose.
How To Display Grammar Errors Only In The Location Window?
In your ~/.vimrc file add the following configuration option:
let g:languagetool_win_height=-1
How To Navigate Commands In The Location Window?
The following commands can be used to navigate the grammar errors in the location list window:
:lfirstjumps to the first error:llastjumps to the last error:lprevjumps to the previous error:lnextjumps to the next error
How to Clear Grammar Error Highlights?
Issue the :LanguageToolClear command.
How To Get Further Help?
- Use vim help,
help: LanguageTool. - Visit the GitHub repo to find out further details of usage. I tend to also browse the Issues of the repository to gain additional insights.
How To Render A Minimal Display?
To render a minimal display, similar to the screenshot below, I use the Goyo and Limelight plugins. The Goyo plugin provides a minimal display, hiding the NERDTreeToggle sidebar, the Airline status bar etc. The Limelight plugin highlights the paragraph where the cursor is currently positioned.
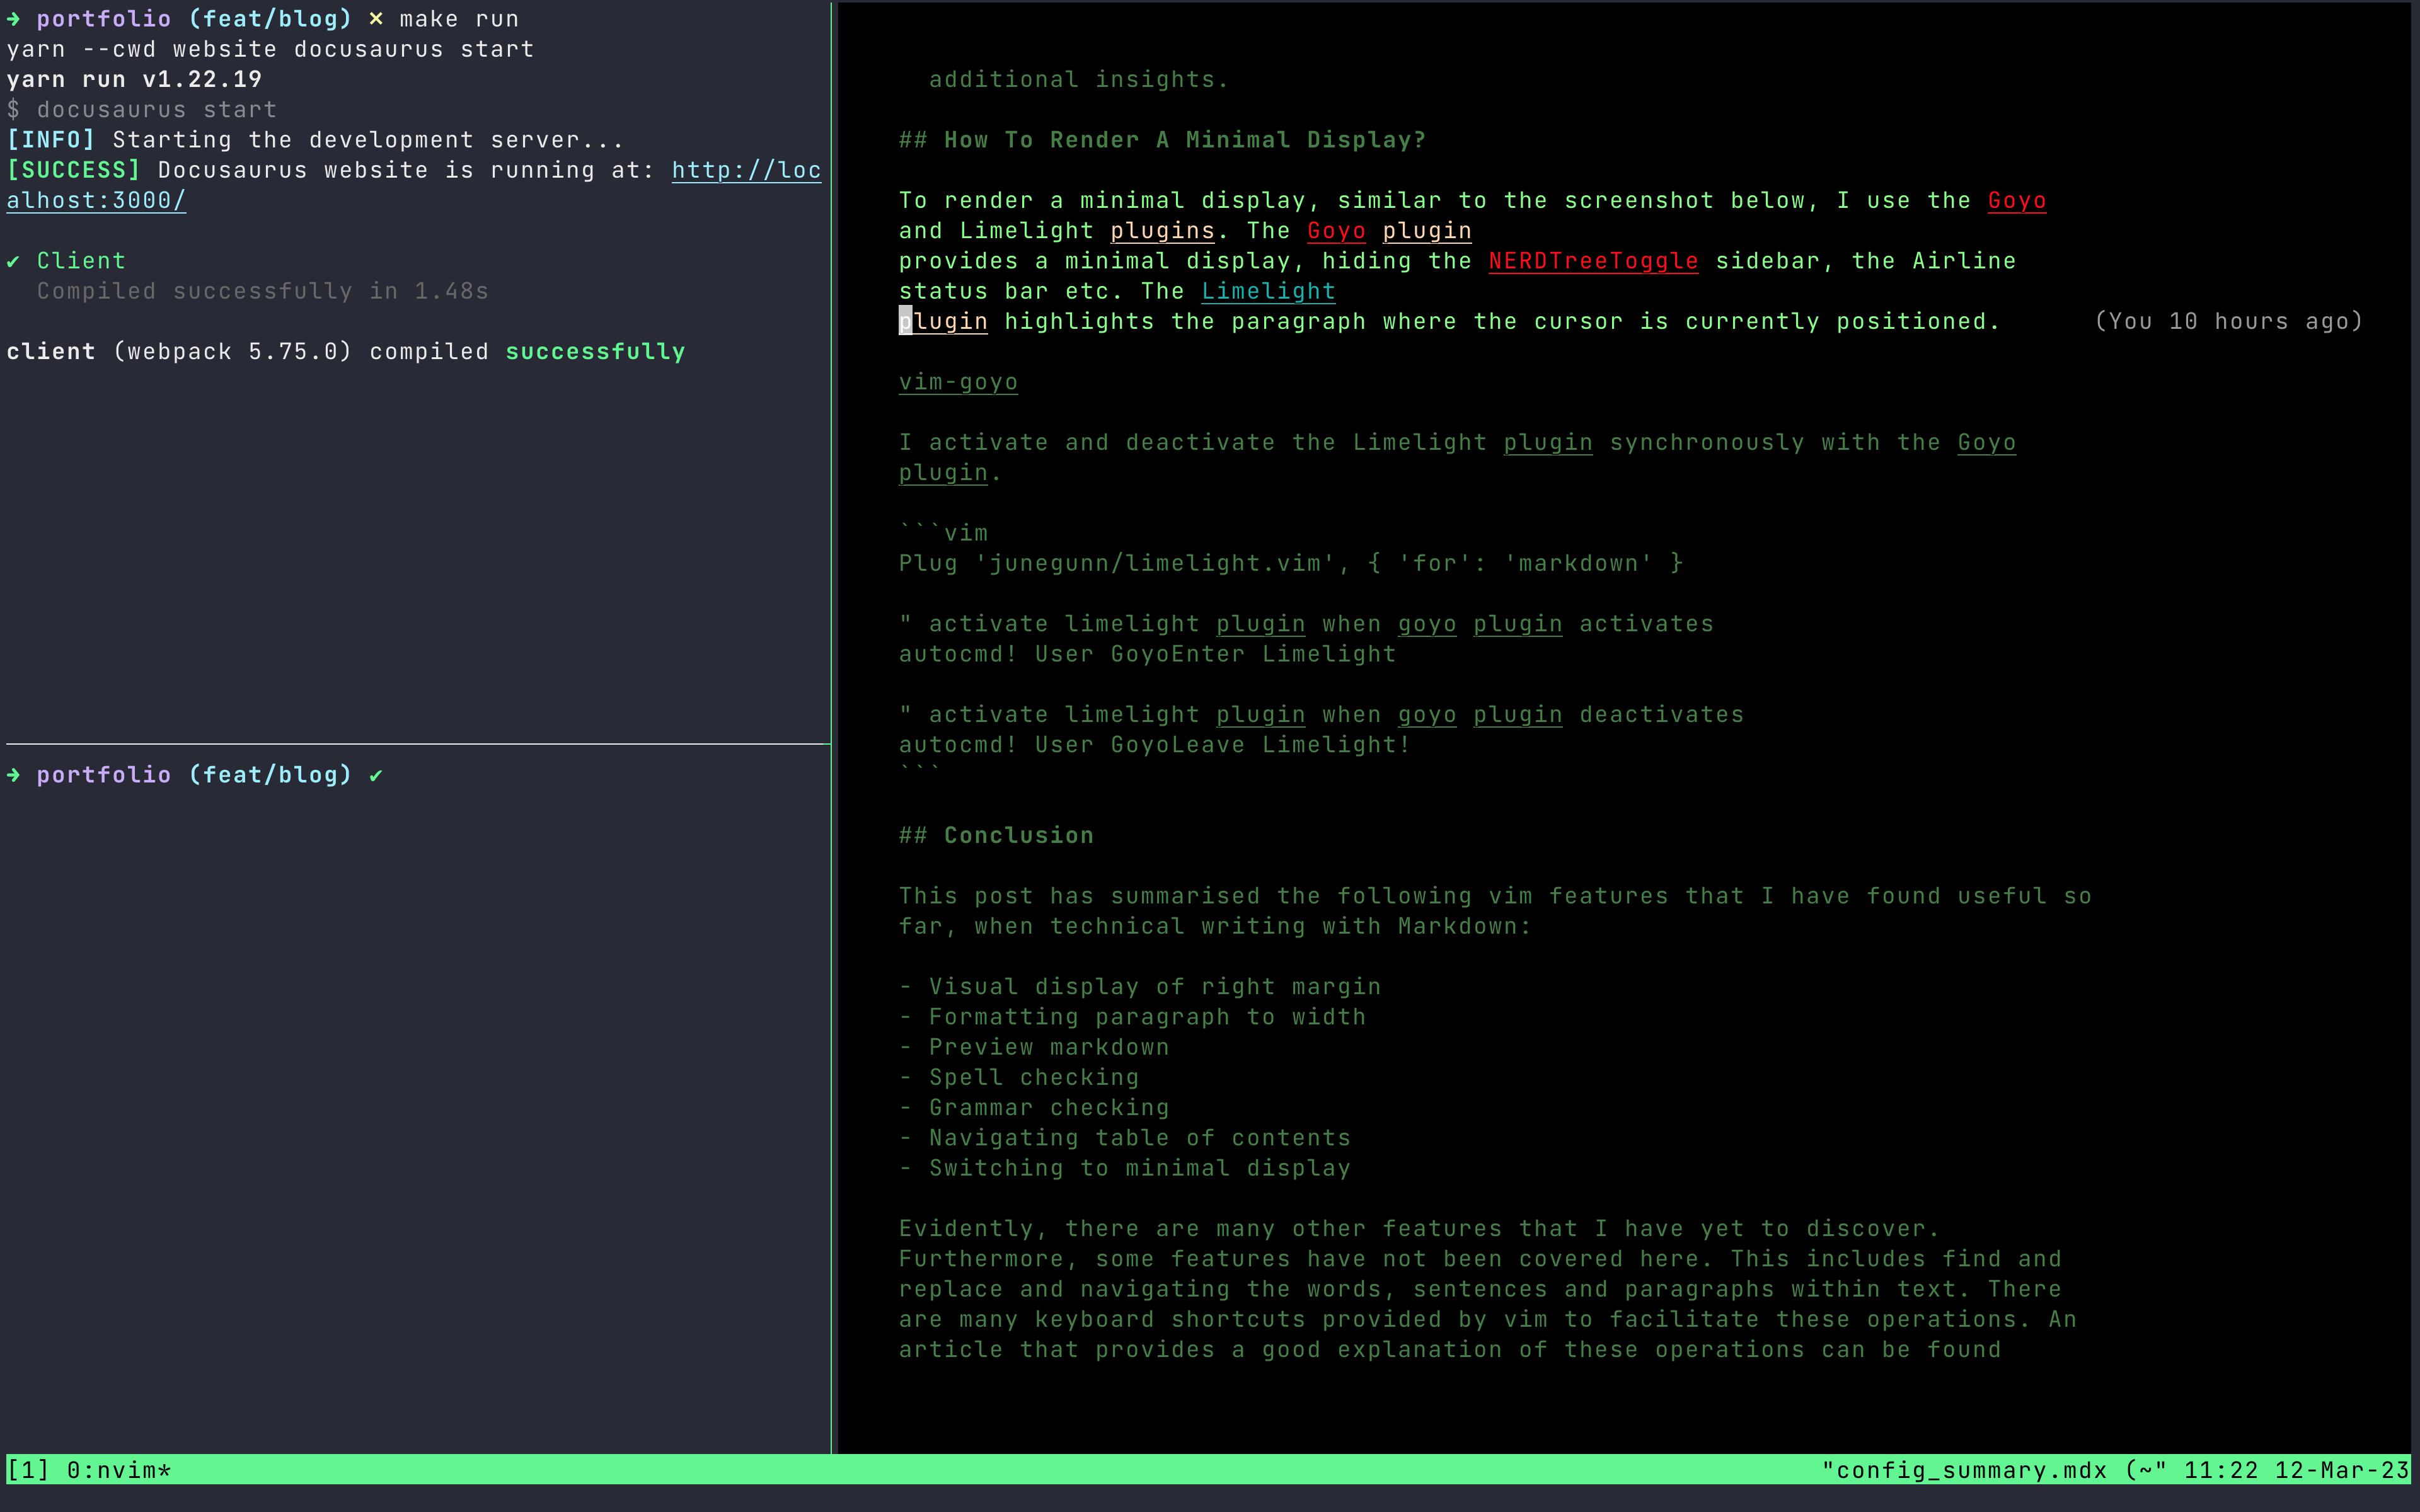
I activate and deactivate the Limelight plugin synchronously with the Goyo plugin.
Plug 'junegunn/limelight.vim', { 'for': 'markdown' }

" activate limelight plugin when goyo plugin activates
autocmd! User GoyoEnter Limelight

" activate limelight plugin when goyo plugin deactivates
autocmd! User GoyoLeave Limelight!
Conclusion
This post has summarised the following vim features that I have found useful so far, when technical writing with Markdown:
- Visual display of right margin
- Formatting paragraph to width
- Preview markdown
- Spell checking
- Grammar checking
- Navigating table of contents
- Switching to minimal display
Evidently, there are many other features that I have yet to discover. Furthermore, some features have not been covered here. This includes find and replace and navigating the words, sentences and paragraphs within text. There are many keyboard shortcuts provided by vim to facilitate these operations. An article that provides a good explanation can be found here. Hopefully this post will be of some use to other technical writers considering using vim and Markdown.